Wednesday, 28 December 2011

DIY Recycling your old Vintage T's

We all have those favourite T-shirts we love and cherish, and as the years pass, they become smaller and worn out although their to precious to give away. why not recycle them and give them a new life?
 I have a confession to make Iam a tinee tad bit of a hoarder, I find I'm always hanging on to certain items hoping to find a new life or use for them.
 I've been hanging onto certain T-shirts I love and used to wear all the time. Sadly I eventually grew out of them. They've been sitting at the bottom of my drawers neglected to be worn for months,they needed a new life. After contemplating finally giving in and giving them away, I decided to give them a new life as art for my walls. I love this because not only do I have original pictures to personalize my place and hang on my walls, but the memories and beauty of the T's will live on :D


Here's what you'll need:

  • Large Picture frames to fit your T-shirt. (these are 30x40cm, 11 3/4"x15 3/4")
  • Old favourite T-shirt
  • Scissors
To do this project takes three simple steps!!!


1.) Take your desired picture frame out of the packaging, take the backing out.


2.) Position your T-shirt where you want it over the backing.

3.) Replace the backing into the frame and secure. Take your scissors and cut the access fabric off the T-shirt. Pick the perfect place for it on your walls and enjoy :D


Yayy!! now your favourite T's have a wonderful new home and you can cherish them for many more years. What I love about this project is the options are endless!!! Recycle your old concert T's, favourite vintage T's any T your proud to display on your walls. 


Enjoy and have fun
What are some of your favourite T's??? 
Would love to see what you guys come up with. feel free to send me emails and pics :D
makeup-addiction@hotmail.com


xoxoxox
Relish


Thursday, 22 December 2011

Top 5 Drug store favourites!

When I was a young preteen, my vanity was full of smackers lip products, glitter gel, maybe line eyeshadow cream, for the most part I never wore the stuff out half the time, (I was a tomboy back in those days) I just loved playing with all the goodies I'd find at my neighbourhood shoppers drug mart, my older cousin Jen and I would walk the 30 minutes it took to get there at least twice a week and we looked more and more forward to it every time. Even then I loved getting creative, experimenting, and playing with all the fun sparkly, colours and stuff! Nowadays my makeup bag consist mostly of MAC, Benefit, Smashbox, clinique ect.. I still love going to my neighbourhood drugstore and picking up new products to test out and experiment with, some I have made a permanent resident and I continue to purchase. Here are a list of the drugstore must haves!! Budget friendly these products can fake high end results.


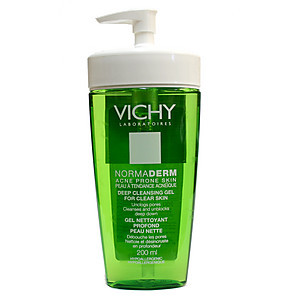
Vichy face cleansing gel: Wow! me and this product go way back, I love trying out new products and I have tried a lot of face washes, gels, scrubs ect.. and I have always come back to this stuff at one point or another. 
fact: It's good to alternate between your favourite cleansers. Have you ever noticed a product works great, until after a year or so you notice it doesn't "work" as well?  Like how your body can become immune to medication, your skin is the same way and therefore its good to alternate between face cleaners, keeping your skin "on its toes," so to speak.
 I remember being 13, like many other 13 year olds acne was my worst enemy. After struggling with many products I finally found Vichy, a decently priced cleanser found in drugstores that showed amazing results. I'm so glad I had this stuff with me throughout my adolescent years. I don't know what I would of done without it. The texture of this cleanser is so smooth and your face feels so clean and refreshed afterwards. Thanks to this product I was able to glide through my adolescence not worrying about acne.

Revlon photo-ready foundation: 
Revlon photo-ready concealer: I love this foundation/concealer duo as my drugstore alternative. I have to be honest I have tried literally every foundation a drugstore can carry. I have discovered foundations that I really love, and some that I've never bought again. This is one that I would definitely buy again. I love the coverage and consistency you get with the concealer stick I almost love using it as much as my MAC concealer it goes on so smooth and blends so well.

Kiss my face: I'm not sure if everyone can find this moisturizer in their neighbourhood drug store like I can, but if you happen to see this product definitely give it a try. Moisturizing is a key step in your daily skin care routine. Like most of you I usually can't afford the high end fancy expensive creams, so this is my next best thing. It's all 100% natural! which is a great start because everything we apply to our skin gets absorbed and passed through the liver in our bodies. Not only that I love the consistency of this moisturizer and I love love love that it doesn't leave your face feeling heavy or greasy. This is also my number 1 moisturizer I use to mix with foundation, the consistency is perfect for creating your own tinted moisturizer. It comes in three formulations for different skin types. I personally love the one with olive oil.

Biore make-up remover wipes: This reminds me that I need to grab some of these next time I'm at the drugstore. I have such a bad habit of falling asleep in my makeup. Some days I'm good about washing my makeup off at the end of the day, but needless to say I find myself waking up with yesterdays makeup smudged around my face more often then not. These babies are perfect to keep in your purse, gym bag, overnight bag, or on your nightstand. What I love most about these wipes is they don't make your face feel sticky or greasy afterwards. They also contain green tea which is full of antioxidant which we all know greatly benefits our skin and bodies, protecting them from damaging free radicals.


L'oreal Infallible lip color: On the nights when I wanna rock a red lip that won't go anywhere! this is my go-to product. it literally never goes anywhere. I can kiss my boyfriend with this stuff on and it doesn't come off!! even he was amazed. With most red lips, I'm always checking to make sure that there isn't any red on my teeth, or smudged outside my lip line, I've never had that problem with this product. The only downside I have discovered with this product is when you apply to much to the lips it "flakes." But all else considered thats the price to pay for an amazing long lasting product. I prefer this compared to all my other red lipsticks, because it doesn't go anywhere. I get my l'oreal infallible lip color in 013 crimson.


What are some of your Drugstore must haves??


xoxo 


.....ps. All my reviews are my personal opinions and experience with the products. Although I do encourage you ladies to try these products if your looking for something new, do keep in mind that everyone has their own experiences and opinions with products and therefore you may not agree with my experiences. 

Monday, 19 December 2011

DIY-Last minute Christmas presents.

Christmas is so close !!! doesn't it feel like it crept up on you??...no??..just me...
Here is a cute christmas present that is perfect for your girlfriends, co-workers, secret santa....
Everything here I made and got from the dollar store so it is a very budget friendly gift, yet shows that a lot of love and thought went into making it.

First off purchase your choice of coffee mugs from your favourite dollar store, I chose ones with simple decoration that I amped up using porcelain paints I got from Michaels, they are awesome to have around for project like these. They are about 6$ and come in a variety of colours, after your done painting your mug, you bake the mugs in the oven which makes the paint dish washer resistant. I just chose to personalize each mug by writing my friends names on the rim.


Now you have cute personalized mugs that can be filled with all sorts of FUN! , candies, chocolates, truffles, candy canes,cookies, fudge ect.. the sky is the limit. I love baking and creating delicious treats, so I chose to make peanut brittle, chocolate truffles, butter crunch toffee, and short bread cookies to fill these cute mugs. Its something that everyone can appreciate and enjoy. 

After making all my goodies I packaged them in plastic bags and decorated with some ribbon.
scrunch tissue paper and filled your mug half way, that way your treats will stand above the rim. Fill your mugs with your desired goodies.

Take two pieces of tissue paper, set the mug in the middle and bring all sides up, tie with ribbon and add your finishing touches. with christmas just around the corner your ready for whatever the holidays bring. You can make multiples of these on such a budget and everyone will appreciate the thought and love that went into making these. 

Get creative with your mugs and give them personality. You can do anything from a simple name, or get really creative and personal and write the individuals favourite quote, nickname, insides jokes, ect..


have fun and very happy holidays!!!
xoxox
Relish


Saturday, 17 December 2011

Christmas baking continues- DIY Cream Puffs

In honour of Christmas I thought it would be nice to share all my christmas traditions and recipes. I know this has nothing to do with makeup or beauty however I love spending just as much time in the kitchen. Its another place that has no rules or boundaries which I love!

You can get creative just as you can with makeup except its food! Christmas is the time of year where goodies and treats are everywhere!! Not only is baking fun but giving treats is a great gift! this is my cream puff recipe, those of you who aren't familiar with what a cream puff or chouz a la creme, if you will, it is a choux pastry ball filled with whip cream, pastry cream, or ice cream. They can be decorated or left plain either way there fantastically delicious and a great treat to serve at your christmas shindig. 

Here's what you'll need :
  • 2 (3.5 oz.) packages of instant vanilla pudding mix
  • 2 Cups Heavy Cream a.k.a Whipping Cream
  • 1 Cup milk
  • Pastry bag (optional)
This is to make the pastry cream filling however you can just use Whipping Cream for you centre. I prefer to buy the Cream and whip it up myself just add 1/2 Cup of sugar and 1 tsp. Vanilla to the cream and whip until whipped cream. 

  • 1/2 Cup Butter
  • 1 Cup water
  • 1/4 Tsp salt
  • 1 Cup all purpose flour
  • 4 eggs
  • 1 Cup milk chocolate chips
1.) Mix together vanilla instant pudding mix, cream and milk. Cover and refrigerate to set. If your just using whip cream add 1/2 Cup sugar and 1 Tsp. vanilla to cream and whip until whipped cream. 

2.)Preheat oven to 425 F

3.) In a large pot, bring water and butter to a rolling boil. Turn off heat and stir in flour and salt until the mixture forms a ball. Transfer the dough mixture to a separate mixing bowl, however feel free to keep it in the pot off the heat if you don't want to dirty another dish, like me. 

4.) Using a hand mixer or wooden spoon, beat in eggs one at a time, mixing well after each egg.

5.) Drop tablespoon amounts of dough onto an un-greased baking sheet, bake for 20-25 minutes in a preheated oven. Until golden brown. Centers should be dry.

6.) When the shells are cool, either split and fill them with the pastry cream mixture/whipped cream. Or use a pastry bag to pipe the pudding mix into the shells.

7.) In a microwave safe bowl, microwave 1 cup chocolate chips for 2 minutes until the chocolate is completely melted. Dip the puffs into the chocolate for a chocolate cover. 


MMmhmmm Don't those look fantastic!!! I decided to jazz mine up a bit by melting white chocolate and drizzling it in soft lines overtop the chocolate. Like always I encourage you to get creative in the kitchen and experiment. Bring these along to your next christmas get together and have everyone amazed!


Stay tuned for more christmas festivities! its just around the corner.

xoxox
Relish

Tuesday, 13 December 2011

My top 5 favourite makeup up books

When I was just a lil one starting out in this industry I looked everywhere for inspiration and words from the wise. Makeup school can be very expensive! 18,000$ expensive!! being 18 and not wanting that kind of debt over my head I heavily researched and talked to many Senior makeup artist who have made great success in this business  and got their input on wether or not to dedicate ones time and money on makeup school. Surprisingly enough they all said around the same thing, that makeup school is good if you have the time and money, but at the end of the day its all about talent, passion and proof of work. It doesn't matter what fancy makeup school you came from if your talented you'll shine. I know many people that have spent the time and money going to makeup school, some manage to break through in the industry and some are still unemployed in the makeup industry. Most makeup schools don't guarantee you will leave their establishment with a full time makeup job..which kind of makes me wonder..what are you paying for??

These are the books that I've stumbled across over the years and absolutely love! not only are they very informative and helpful to everyone, makeup artist or not, but the artistry in some of these books is amazing! I still browse through them from time to time for information and inspiration ....


5.) Kevyn Aucoin - Making Faces
This book is an absolute must for anyone starting out in makeup. It covers all the basics from highlighting and contouring to eyeshadow application. Kevyn Aucoin is a very talented makeup artist who has made his mark on this industry as one of the best. He knows it all and he shares his secrets and displays his beautiful transformations. This was one of the first makeup books I bought and I still enjoy browsing through it.


4.) Kevyn Aucoin- Face forward 
Again another amazing book by Kevyn Aucoin, displaying his amazing transformations and reveals them with step by step instructions.

3.) Scott Barnes- About Face
Scott Barnes is an A-list celebrity makeup artist. He has worked on the very talented faces of Gwyneth Paltrow, Kate Hudson, Hillary Duff and Christina Aguilera. He is the makeup artist of Jennifer Lopez and is the brilliant genius behind her famous JLO glowing skin. In this book he shares all his secrets for creating looks that can be used everyday. This book is packed with amazing information and tips for someone who is just starting out in the industry or for any beauty lover looking for more secret tips.


2.)Alex Box by Rankin
This book is amazing for inspiration and displays the amazing art work of Alex Box, a true artist, she is anything but an imitator. She is truly original in her work and has worked with some of the most experimental and avant garde designers, photographers and hair stylist in the fashion industry.  She is nothing less then a master of colour and creativity. I absolutely love her work for this and she truly is an inspiration.


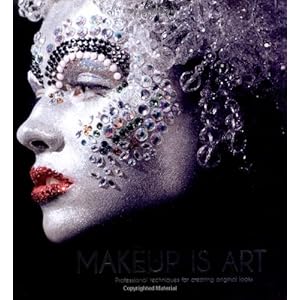
1.) Makeup is Art
I Stumbled across this book when I was furiously browsing through the makeup section of Chapters. This book is done by various creative makeup artist who truly use makeup as a form of art. This book is filled with inspiration and is great just to have on your coffee table for anyone to browse through. I don't know anyone who wouldn't appreciate all the work that has been put into this book it truly is a work of art and is one of my all time favourites.


I hope you find inspiration in all these amazing books like I did. 
Get inspired and follow your dreams!


xoxoxo


Relish

Saturday, 10 December 2011

Countdown to christmas-DIY candy cane nail tutorial

Your house doesn't have to be the only thing decorated for christmas...Try adding a little festiveness(dunno if its a word but I think it fits) to your nails! of course you could just paint them the typical red, green, white etc.. or you can really get the party bumping with some candy cane swirls to accent those digits (fun fact: finger bones are called digits)

Anyone who isn't familiar with water marbling your nails please go to youtube, search water marble nail art and be amazed!!!! mysimplelittlepleasures.blogspot.com, she also has a youtube channel, she is amazing!! and from what I can see is a true pro. I cannot take credit for this. Iam in no way a professional at this I just stumbled across this technique and I haven't stopped since! As a person who hates painting their nails this technique is so fun and amazing!! I could have honestly jumped over the moon and fly across the globe I was so ecstatic when I did this. I even made my boyfriend watch and be amazed. 

here is my take on candy cane swirl nail tutorial.

Heres what you'll need:
A plastic cup: I got creative and cleaned out an old sour cream container.
Filtered room temperature water: It's half way filled in the cup
Polish colours of your choice: Since its a candy cane theme I'm going with a red, a silver and a white. all three of these nail polishes are from the dollar store but try using what you have on hand.
sharp stick to create designs: I just stuck a needle in the end of a pencil eraser, works great.
Tape: any tape will work I just use regular clear tape.
Paper towels: you know just to keep things clean :)


My camera couldn't really pick this up to well but first you want to tape off all four sides around your nails, so that only your nail will be polished not your whole finger. you can do this as you go but I recommend having all nails prepared just to have it go by more smoothly and efficiently. 


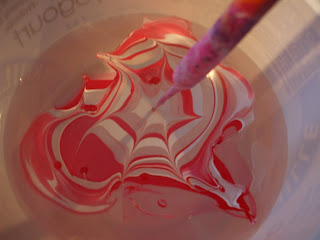
Now this is the amazing part!!!!! I didn't even know you could do this with nail polish, but all you do is take your colour and place a dot amount onto the top of the water, it will disperse outwards, taking your second colour continue this process over and over until u get a bullseye type design.

Using your pointed stick, create a swirl design by running your stick gently through the bullseye.

Place your nail in the water where you want your design to be on the nail. for most nail marbling they do one finger at a time, I decided to get crafty and try four at once. once your nail is submerged in the water take your stick and gather the excess floating polish so that it doesn't ruin your nails. remove your finger and dry.

When you take your nails out of the water they will look like this...AMAZING! right?? ...remove the tape around your nails and apply a good clear top coat of polish.


Obviously this is more of a process then just painting your nails but the results are so amazing and the process alone is fun! experiment with different colours and designs. It may be tricky the first couple of try's but keep practising ! I got so many complements on my nails and everyone was so curious as to how I did it...even my boyfriend was impressed ;)

For more designs, or a more professional take on this technique please check out
mysimplelittlepleasures.blogspot.com


xoxox 
happy painting
Relish

Countdown to christmas-DIY's

Yayy Christmas is coming!!! 
Relish's Countdown to christmas...
you know what that means?? lots of baking, wrapping, shopping, wrapping, baking, decorating which to me is the whole fun of christmas. I love giving gifts which is essentially what this holiday is all about right??  but these gifts don't have to be big, expensive and extravagant for people to appreciate them. I love taking this opportunity to give gifts from the heart that are made with my two hands and a whole lotta love!!! Keep in touch with me as I share with you my favourite homemade gifts to give and christmas goodies and festivities.

Since this is December I thought all month ill blog about all things christmas!! and what I love about this time of year...

One of the first things I'll be sharing with you today is my all time favourite sugar cookie recipe. Christmas to me is all about baking treats and handing them out to loved ones, mainly because thats what I remember doing with my grandma as a child. not to mention its much more wallet/budget friendly. My grandma has long since passed now, but I have with me her book of recipes which I take great pride and special care of to ensure her treats and love live on always. Of course I have also taken the liberty of spicing some of them up along the way, adding my own twists and special touches, and I encourage you to do the same :D


Heres what you'll need:


For the cookies


1 1/2 Cup Unsalted softened butter, just leave the butter out till it reaches room temp.
2 Cups white sugar
4 Eggs
1 tsp Vanilla
5 Cups All purpose flour
1 tsp salt
2 tsp baking powder


For the Icing

1/2 Cup unsalted butter
1 1/2 tsp Vanilla
2 Cups icing sugar
2 tbsp Milk
Food colouring of your choice


Cookies


1.) Pre-heat oven to 400 F. In a large mixing bowl cream together butter and sugar until smooth. 
2.) Beat in eggs and vanilla.
3.) Gradually stir in flour, baking soda, and salt.
4.) Cover dough and chill for 1 hr in fridge. 
5.) Roll out dough 1/4-1/2 and inch thick, cut into shapes and place on an ungreased baking sheet 1 inch apart.
6.) Bake 6-8 minutes until slightly golden brown on edges, cool completely.


Special note: try getting creative and adding a little something to the dough before it bakes, with the green cookies below I added little Scor chocolate pieces to the mix, you can also try adding toffee pieces.

Icing...these cookies are delicious on their own but if you want to spice them up a bit..
In a saucepan melt butter, combine icing sugar until incorporated, add vanilla and milk, stir until well incorporated and creamy consistency. add food colouring of your choice.


While icing is still warm cover cookies and sprinkle with goodies of your choice. 


My first christmas cookies of the year....


These cookies are so good!!! Not exactly calorie friendly but its christmas, this is the time of year where I indulge in all the festivities. and they don't have to be just for christmas, get creative and use different shapes and colours to make cookies all year round. Have fun and get your bake on!! who doesn't love getting cookies for christmas!! Just place these tasty tots in a festive christmas tin (dollar store) and your good to go!


please keep in touch for more of my favourite christmas recipes to come..


Peanut brittle
Almond roca
Short bread cookies
Buttercrunch toffee


What are some of your holiday favourite treats??


xoxoxox
Relish