Sunday, 4 December 2011

Oprah, Designers, jewellery...what a weekend!

hey everyone :D.....what did all of you get up to this weekend?? go to a party? see a movie?? spend time with the important people in your life???....well this is what I got up to this weekend..

Friday: Oprah!! Did full makeup for a beautiful Bride and her wedding party..but it was something much more then that.. this beautiful bride will be featured on Oprah's network january 22. She has been through so much and our local community thoughtfully gave her and her husband the day of her dreams, a day they've been trying to plan for years but given certain circumstances was out of their reach.. I was very fortunate enough to be a part of this beautiful heart touching day for her and her family and volunteered my services so that her beauty radiated on her special day. Tune into Oprah's network channel for this beautiful brides story and happy ever after ending, and more touching stories about the local community of Aldergrove B.C, Canada.

Saturday: Bling Bling? Instead of going out for a night on the town I decided to stay in and let my creativity have a ball....heres what I created...some of my friends may just find these under their tree's ;)
what started out as this 
Became this...  
After power-crafting for a couple hours I finally ended the night, still more treasure's in the works..keep in touch for the tutorials on how to create the above creations.
(If interested in purchasing any of these fantastic pieces made with love..please feel free to contact me)


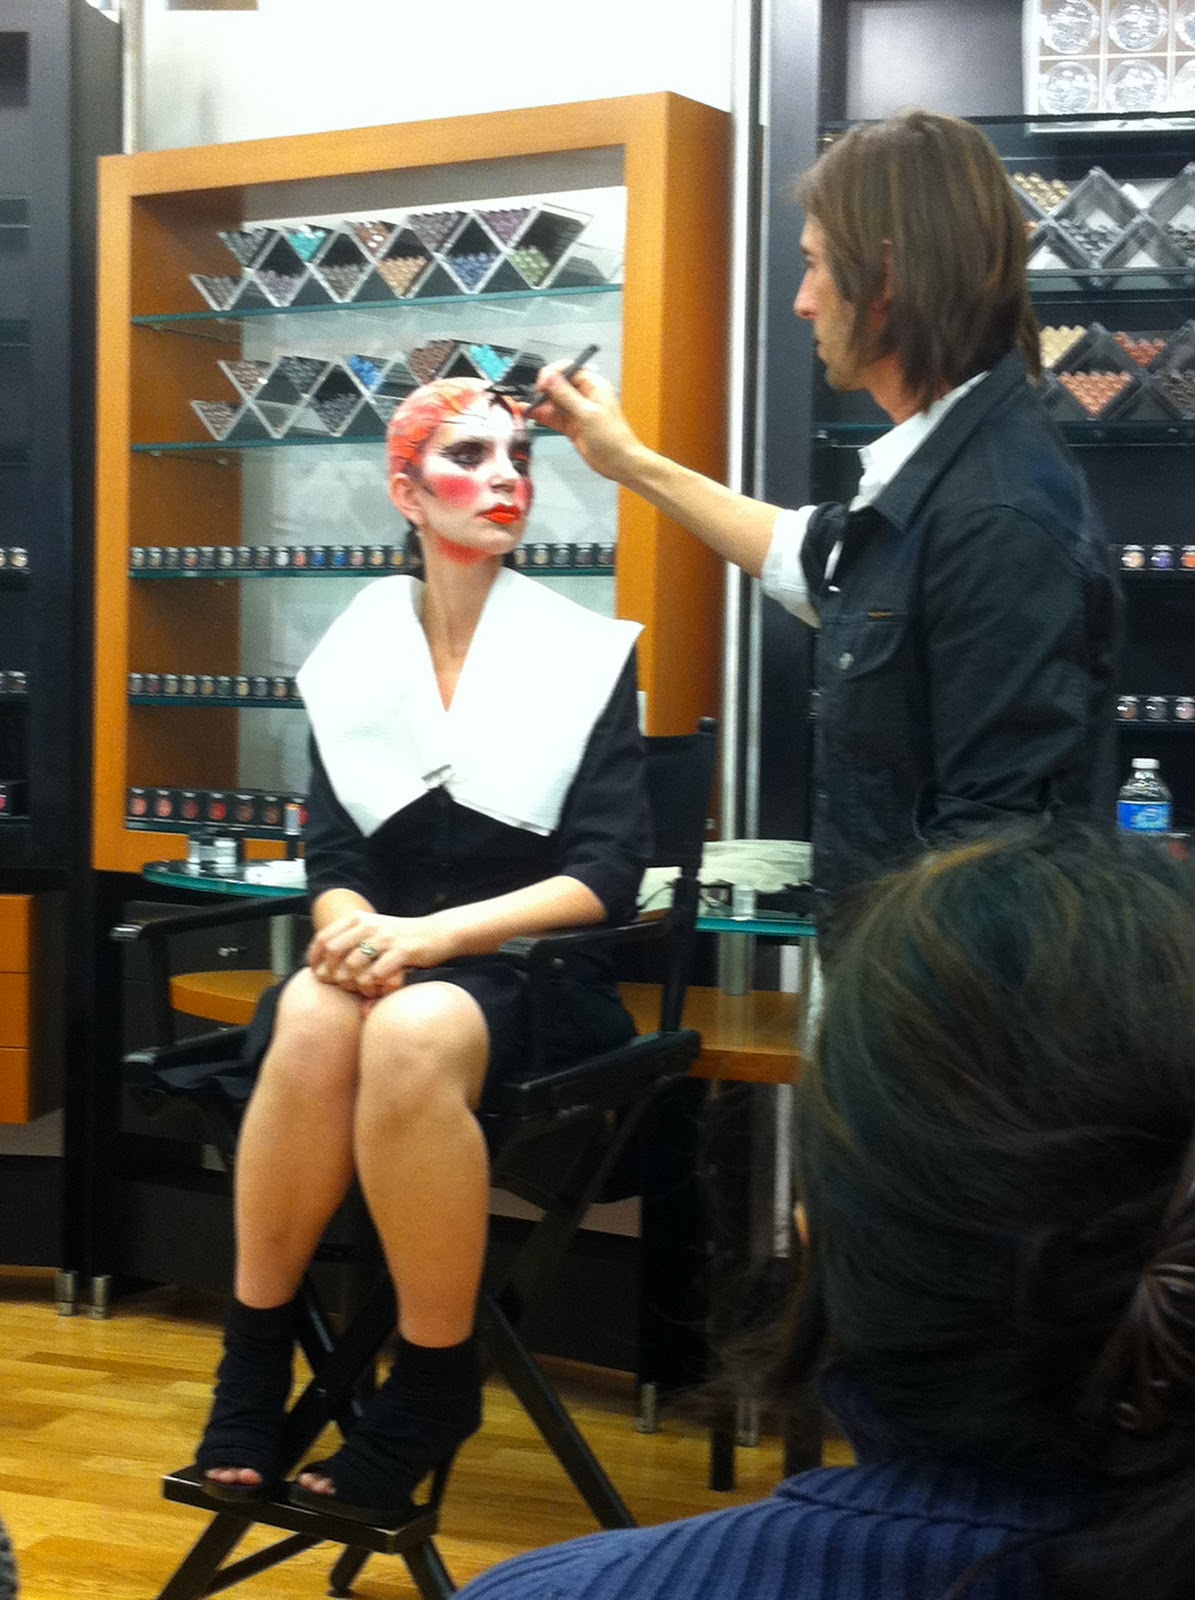
Sunday: A Special Designer... Today I had the privilege with working with a young, local Vancouver designer doing hair and makeup for his latest photo shoot. Tommy is such a talented self taught designer with such creativity and such a positive spirit and an impeccable eye for detail. Instantly meeting I felt we were going to make beautiful images together. Tommy likes to volunteer his time at a local shelter teaching beautiful strong women to make jewellery, I admire this about him so much and I became even more excited to be a part of this project.  Bringing out self esteem, confidence, and a women's natural beauty is the best part of what I do, and I'm always very excited to be a part of that moment when a women finally see's and realizes that she's beautiful! We met at a local shelter in downtown Vancouver, todays models were two beautiful young women who have been living at the shelter. Not your typical agency hired models, these women were beautifully real, with no previous modelling experience. Neither of them have never had their makeup done before so I was very excited to take them along on this beautiful journey. Tommy wanted a very specific look. He wanted the ethnicity of their skin to shine through, with a very neutral eye and bold black liner. Hair was a simple chic ponytail. I had a lot of fun working with the team today and I look very forward to the upcoming fashion show of which I will be participating backstage as a hair stylist keep in touch :)..in the meantime here are a couple behind the scenes of the day...


Please check out his amazing work....

Yasuhiro Tomita
Vancouver, B.C
Designer at Rukus

RUKUS new age / new edge:  http://www.rukus.jp/ 
Group Exhibits KIRA KIRA :  http://www.kira-tokyo.com/


Special note: for all you local vancouverites (I think thats what were called) 

All proceeds to the show go to vancouver homeless shelters. come see some local 

talent and support your community.


Saturday, 3 December 2011

DIY- not your average French toast

I know I know.. French toast has nothing to do with makeup. However cooking is also a great opportunity to get creative and try new things, wether its adding a different spice to a dish or changing it completely the kitchen is a great place to get creative too!!! I love cooking!!! Ive been cooking since I was just a wee little one....my mom never did much cooking, so at a young age I taught myself how to cook so I wouldn't have to eat the Macdonalds she usually brought home for dinner. I love cooking as opposed to eating out. For one its way more wallet friendly and I love how I know what is going into my food and that I can control the flavours.
Today's kitchen adventure started as another ordinary saturday morning, I decided I was in the mood for some French Toast for breakfast and as I proceeded to the kitchen to whip up my french toast I realized I WAS OUT OF MILK!! AHHH my disappointment slowly started to sink in but the creative lightbulb in my head went off in my head and as I opened my fridge door I grabbed Vanilla greek yogurt and one egg, my journey started there. Your typical French Toast recipe is usually egg, milk, vanilla and cinnamon. Since I didn't have milk or vanilla or cinnamon I had to get crafty heres what I came up with and let me tell you it is fantastically delicious!!!

  • One egg
  • Two or three spoonfuls of Greek Vanilla Yogurt..im sure you can use regular yogurt but I had greek style in my fridge.
  • A couple teaspoons of Baileys or Carolines liquor (a creamy liquor typically added to coffee)
  • Thick texas style toast, any toast would work though.
Mix all ingredients together into a dish or bowl until it is a creamy consistency, dip your bread into the mixture on both sides and place onto a preheated buttered skillet and cook until golden on both sides. Taadaa deliciousness awaits you just add butter and syrup and your good to go. Or get creative and create your own condiment to go on top.


So next time your in the kitchen try adding a little something to your favourite dish and get creative

proudly enjoying my delicious creation

other times I'v gotten creative with food.....
Brushetta, basil, and goat cheese on crackers, not totally original but they sure are delicious little biscuits ;)

Stuffed Brushetta zucchini with breaded parmesan crusted zucchini sticks
Ice cream with coffee liquor, peaches, chopped nuts and fresh mint leaves.
...the best recipes I find are the ones where I just "wing" it and have no recipe to follow. but start off slow get creative and when it comes to cooking sometimes a few simple changes are best. 

what are some of your creative recipes ???

Happy times in the kitchen 
xoxoxo
Relish

Wednesday, 30 November 2011

Product review-Benefit Pore Professional

I have recently stumbled accross Benefits Pore professional mainly because I love trying out new products. This product can be used before applying your foundation, like a primer. Or can also be used over your foundation to help soften and "shrink" your pores (as the women at the cosmetic counter ensured) When I applied this to my face the first thing I instantly thought was "Wow this has such a great texture," lol let me explain....Iam so picky when it comes to putting lotions or creams on my face...I hate anything heavy, greasy, oily or "suffocating" to my skin. I didn't think this at all with this product! it went on so smooth and creamy yet light, translucent and clean, I was very impressed.

As for the Pore "shrinking," well..despite all the face cleansing ads out on t.v that claim their products will "shrink your pores." The fact is that pores are incapable of changing size...they will always stay the same size and will not physically "shrink." Your pores can open, close and appear to be minimized by using products but will not shrink. This being said lets give a big hand of applause and top our hats off to BENEFIT. for being up front open and honest saying right on the packaging to minimize the appearance of pores. This product although obviously did not magically "shrink" my pores. However It definitely softened them making them appear soft and not as noticeable, with a almost airbrush look and feel. I have only used this personally on myself but will be trying it out with my future bridal clients.

 Using a primer under your foundation is a very important step to ensure that the skin is well prepped for foundation. It allows the foundation to last longer without slipping, protects the skin from damaging free radicals, fills in any fine lines or wrinkles for a smoother application, and with some primers that contain silicone will absorb oils throughout the day help keeping your makeup fresh. Applying your day moisturizer before foundation will also act as a primer for your skin.

If your in the market for a new primer and want to try something new like me, I would definitely recommend Benefits Pore Professional...... what are some of your recommended primers???


RELISH RANDOM TIPS: when washing your face. cleanse using warm water to open the pores and clean out all the impurities. after all the cleanser is rinsed turn the water to super cold and splash the cold water on your face, this closes the pores keeping them squeaky clean ;)

The same rules applies with your hair. If you have really hot showers...like me... the cuticles (outer layer of your hair) open allowing the shampoo to cleanse the hair (however if you have coloured hair this may also cause your hair colour to fade quickly) When conditioning rinse the conditioner from the scalp only and let the conditioner run to the ends(where its mostly needed), turn the water to cold and rinse with cold water. This will close the cuticles with the conditioner in the ends, resulting in smoother hair.


Update: I have since been using this product on myself as well as my clients and I still love it!! This is my go to primer for all my brides, grads, runway models ect.. I have gone through many tubes of this stuff and my clients all love it! They always mention how smooth and silky there skin feels, after I've applied this primer. I have even used it on men for HD shots. This product gives the skin such a smooth silk like texture, I absolutely love it!! it makes applying and blending foundation is effortless. Thank you benefit as always you rocked my socks off!!!

how have your experience's been...did you fall in love like I did??


xoxoxo.....Relish


Tuesday, 29 November 2011

creative therapy?

I was going through pictures on my old computer and I found these!!! These are years old!! taken of me late at night, on the nights that I couldn't sleep (I don't sleep much) I find it's really late at night when my brain does its best thinking and my brain just keeps thinking and my wheels keep turning and I can't sleep! so why not bust out the makeup and do whatever!  I wasn't kidding when I said I'm a makeup addict ;) ...enjoy and get inspired!...keep in touch I'll be doing more creative looks in the very near future.


Thank you so much for taking the time to read my post, I hope this encourages you to some creative therapy....


xoxoxo
Relish


Monday, 28 November 2011

MAC-Advice from a Pro

Hey everyone :D I just wanted to share with you what I had the pleasure of attending this past sunday. When you are a MAC cosmetics Pro member you are qualified to take various masterclasses held on by MAC taught by various senior MAC artist who are well known and respected makeup artist that have worked in all aspects in the industry and have traveled the world working on TV, runway, Celebrities and everything in between.


The class I attended was "Makeup is art," teaching the concept of an "organic" way of doing makeup. and demonstrating that makeup doesn't have to be all beauty and glam but can be used as an art form. I was quite pleased to attend this class because thats exactly what makeup has been to me for years. Not just a way to bring out a women's beauty and confidence but can go beyond that. With makeup their are no rules, no boundaries, No directions or guidelines. It truly can become an art form,with the human body as the canvass. I always encourage to get creative because at the end of the day you can always wash it off.

John Stapelton was the MAC senior artist that took us on an amazing journey through this class. Demonstrating his organic approach to makeup, and sharing with us all this tips, tricks, inspirations and his insights and stories through this competitive industry.
John Stapelton has been with MAC for 16 years and has traveled the world working with well known names in all aspects of the industry. I have to say I LOVED! this class, it was so inspirational to hear from someone that shares the same passion and outlook on his work, and he was super friendly!!! To be honest I was pretty intimidated to meet someone with such talent and who has built such success in the industry however he encouraged questions and I was very excited to have had a little chat with him after the class. I got his insight on the industry and as a young makeup artist how can you make it and stand out. He continued to say "work hard!, be honest, inform people of your intentions and your goals and to just be young and be a star!"
We all gathered at the MAC store on Robson in Vancouver! (ps. it was the grey cup was in vancouver and the BC Lions won!) The room was filled with many excited, anxious, passionate individuals all displaying their own unique style. John was introduced and as we all clapped and cheered he introduced himself and began to share with us everything he knew about the industry. He was very personal with his stories sharing with us where he gets his inspiration from and how he approaches a client and a look.
The look he did today was inspired by a painting by Camile Rose Garcia, who is one of his inspirational artists. He continued to take us along on this journey of bright neons colours, intense contouring, dark dramatic homemade pieces and of course glitter! showing that he doesn't really know what "he's doing" but that he's just working organically building the look as he goes . After  many applications of airbrushing,  Paint, Neon pigments and glitter!! the look was complete. Although it isn't a look you'll be seeing on the runway anytime soon it truly was amazing. Makeup is like painting and like art so get inspired and be creative! If not with your makeup, he suggested keeping some water-colour paints around and to just "do whatever, no ones going to see it but you." So this is what I encourage all of you to do. Paint, draw, craft, cook.. release your inner artist and ease the mind with creativity. Creative Therapy??
 the inspiration..painting by Camile Rose Garcia 


What inspires you?? Is it a painting of a particular artist? music? magazines? nature? books? ect..
Look for inspiration everywhere and have fun with it!


Happy creative therapy
XOXO
Relish 


Sunday, 20 November 2011

DIY-Trash into treasures

It's Sunday!!! a.k.a CRAFT DAY !!! yes this is the day where I put on my fuzzy pink slippers, my black with silver star house coat and I craft like it's nobody business. Todays inspiration started with me cleaning out my fuzzy pink jewelry box that I've had since I was a pre-teen, containing jewelry I've also had and have never worn since I was 13. Instead of letting it sit there unworn and collecting dust for another 8 years I decided to revamp and give them all a makeover, transforming them into something new.
The before: A collection of all my old treasures that have been neglected and are in need of revamping.


Subject 1.) This is a large decorative pendant that fell off the middle of one of my favourite black v-neck shirts. I still wear the shirt pendant less and me being the little hoarder Iam kept the decorative piece for a rainy day. I never knew what to do with it until today. Today were revamping it into a original hairpiece.

 
Here's what you'll need:
                 Recycled decorative pendant
Black craft feathers (optional)
Thin Jewelry wire
Glue gun
Thin black head band

To give this future hair piece a bit more edge and decor I decided to add some black feathers. So my first step was to glue the black feathers to the back of the pendant. I kept the feathers minimal and simple so it will accent the piece without over doing it. 

After your happy with your pendant the next step is to simply glue the piece to your headband in the position you'd like it to sit on your head. I decided to give it more stability by wrapping and securing small pieces of the jewellery wire around the headband and pendant.

Before: A plain simple hairstyle 
 

After: Re-vamped and fabulous


Subject 2.)  This is a netted floral decorative piece that had also came off another one of my shirts, I  had also tucked it away for a rainy day and today it will be transformed into another fabulous hair piece to add to the collection. hair pieces are a great way to recycle and reuse while having the potential to vamp up, accent and orginalize (a made up word from yours truly) any outfit.
Here's what you'll need
Netted flour
Glue gun
Hair piece
Red feathers
I wanted to add something more to this simple black netted flower piece so I decided to add red feathers to accent and vamp up the black. 
Turn the hair piece over and glue two or three red feathers to the underside, I also tucked and glued the longer pieces.
After simply just glue your flowered piece to the hair piece in the position you would like it to sit on the head.
No Iam not naked I have a tube top on. 
What was once a decorative piece of a shirt is once again transformed into a fabulous hair piece. I love black and red together I think this colour combination is very sensual and sexy. This will be a perfect hair piece to pair with a classic little black dress and sexy black pumps.

Subject 3.)  A collection of bracelets that have been neglected over the years and are in need of a transformation.
These bracelets have been neglected for to long so I decided to recycle the beads and transform them into...
A elegant beaded necklace with matching earrings, I even had beads left over to create other goods :D
sorry I don't have a step by step for this one it's a bit more complicated to just put into pictures and words but if you keep in touch I will eventually be turning all my DIY blogs into tutorials for youtube :D


Subject 4.)  I've had this necklace with matching earrings for years and have worn them maybe once, and I only have one of the earrings because I lost the other one. 
So I decided to give this piece a makeover and decided to transform them into....
I kept one of the earrings and I decided to piece apart the necklace and create another earring with more length and feathers to it. I cut the necklace to the length I wanted and added the earring hook using jewellery wire. I also attached the feathers to the middle and end of the earring using jewellery wire. I still have some of the remaining necklace put aside for a rainy day.

Subject 5.)  These are various necklaces I've literally had since I was 13 and have never worn. I decided to cut them and use them for their beads to create other pieces.
This is what I've created so far with the recycled beads
Notice the metal beads, metal stars, and the pink beads from the necklaces above. And the pearl beads are from the previous bracelets.

Subject 6.)  Since christmas is around the corner star decorations are everywhere. I purchased this gold sparkly star from the dollar store but I didn't buy it to decorate for christmas but to give it some originality and hang it year round in my house. (I like stars :D I have Purple, Pink, Turquoise and LIME GREEN! stars tatoo'd behind my ear)
Now you can't really go wrong with gold and sparkly but I decided to take it to the next step and give this star some Relish swagger. I like bright pastel colours, Lime Green being my favourite colour of all times, Purples, fuchsias and turquoises quickly following the list. I decided to go for a aquamarine colour for this particular star. 
Aquamarine is created by mixing blue and green together, I love mixing paint and making your own colours. Colour theory in general is such a fascination to me. Being a hairdresser you learn all about the colour wheel and colour theories and how colours can complement each other and also neutralize each other. When purchasing paint all you need is the three primary colours (colours that cannot be created) Red, Blue and Yellow. You have these three colours in your craft box and you can make any colour by combining them for example. 
Color theory 101
Red+Blue=Purple
   Blue+Yellow=Green
  Yellow+Red=Orange
Combine all three primary colours and you make Brown.

This is the colour I came out with. I have to be honest I did want a brighter pastel aquamarine colour but I like the subtleness of this. I hope to do a couple more in pink and purple.


 I love recycling old treasures and turning them into something new!  Or even giving new items some originality. Find inspiration anywhere and I encourage you to go through your old treasures and give them a makeover. Its a great way to recycle and get your creative juices flowing, and when people complement you on your fabulous one of a kind treasure's you'll proudly be able to respond "thanks I made them" 

                                                                             Happy Sunday!!!
                                                              XOXOX
                                                         Relish

Product review-Full coverage foundation

Hey everyone!!!!!
Iam here today to introduce you to one of my all time favourite FULL coverage foundations. We all know that the essential part of any work of art is a well prepped, clean canvas to work from. Makeup is no different.
There are hundreds of foundations out on the market today with various coverages and formulations. Your typical everyday foundation is usually a sheer to medium coverage foundation, designed to give you coverage without your complexion looking "cakey" however sometimes these foundations don't meet the needs of people with certain skin conditions like redness, scaring, acne ect...


Let me introduce to you vichy derma blend corrective foundation. This stuff is FULL coverage, when I say full 
coverage, I really do mean it. This foundation is very heavily pigmented as it's specifically designed to cover
and correct certain skin conditions. It is hyper allergenic so it won't clog pores and for a full coverage foundation it 
doesn't feel heavy or cakey at all! I stumbled across this stuff at my neighbourhood drugstore where Vichy productsare sold. I had a photo shoot so I needed a good full coverage foundation for photos I discovered this stuff and
haven't looked back!
Like I mentioned it is a full coverage foundation and therefore may not by practical for everyday use, so for day looks I simply use a touch of this to my everyday moisturizer to create my own tinted moisturizer. A little goes a long way with this stuff so be careful not to use to much or it can be hard to blend because it it such a thick pigmented formulation. There are some cons to this foundation, the colour choice is very limited and it can be a bit more pricy then your typical everyday drugstore foundation. Given the coverage and how little you have to use i think the money is well worth it. This stuff is perfect for when you need a full coverage without it feeling greasy or cakey. It works great mixed with your daily moisturizer to create your own tinted moisturizer with good coverage as your everyday foundation. I definitely recommend this product if you need more coverage for redness, acne, scars act.. or for performance or photography where  full coverage is a necessity.